Partition a Windows Drive After Installation
Partitioning a drive in Windows is usually done during the installation of the operating system. At that stage, a large hard drive is divided into two or three smaller drives as per requirement.
But what if you want to partition your drive later? Fortunately, this can still be done using:
- Windows’ built-in Disk Management utility, or
- Free third-party software.
In this guide, I’ll walk you through partitioning a drive after installation using a popular freeware tool called MiniTool Partition Wizard.
You can download it here: MiniTool Partition Wizard
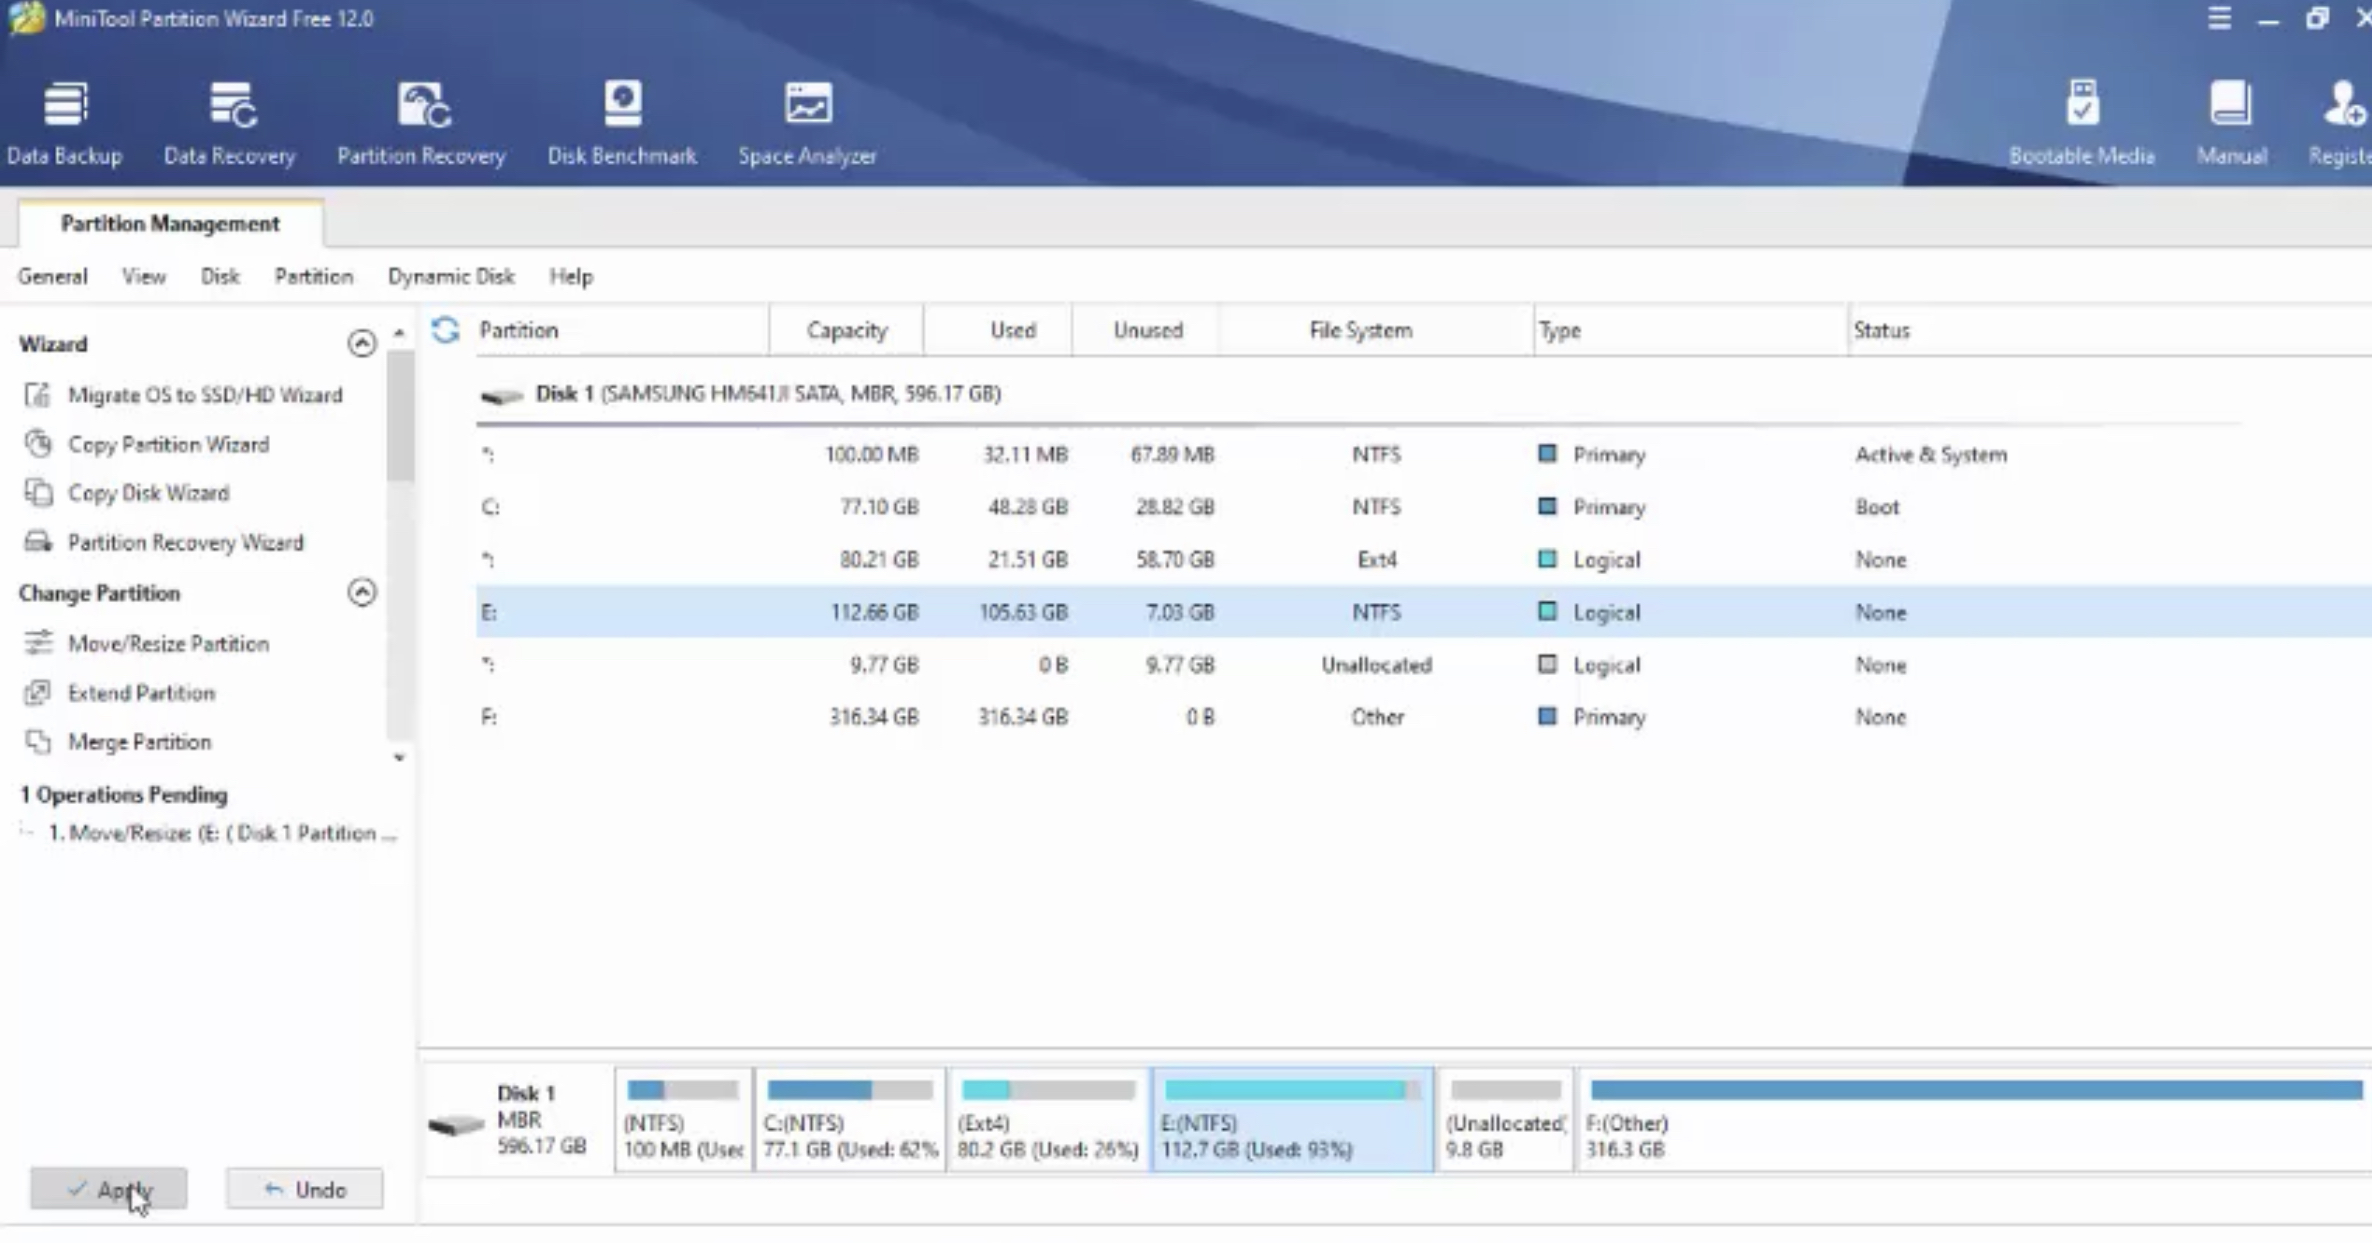
Step 1: Install and Launch the Tool
After downloading and installing, launch the software. You’ll see the following screen with all available drives displayed.

Step 2: Select the Drive to Resize
- Right-click on the drive you want to partition.
- Select Move/Resize.
Now, drag the slider to shrink the current drive and create unallocated space.

⚠️ Important: Resize only up to the blank (free) space. If you shrink beyond the available free space, you risk data loss.
👉 Example: My E Drive is 122 GB in total, with 105 GB used. This means I can safely shrink it by about 17 GB (122 − 105). For safety, I left a bit more space unused.
Step 3: Apply the Changes
- Once you’ve adjusted the drive size, click OK.
- Then click Apply (bottom-left corner).
- Wait for the tool to process. You’ll now see unallocated space just after the resized drive.

Step 4: Create a New Partition
- Right-click on the unallocated space.
- Select Create.

Here you can:
- Label the partition with any name (optional).
- Choose partition type:
- Primary → Used for system/bootable partitions.
- Logical → Best for storing data. (I chose Logical in this example.)
- Assign a drive letter (make sure it’s not already in use).
- File system → Select NTFS (default for Windows).
- Cluster size → Leave it as default.
Double-check everything, click OK, then click Apply again to finalize the changes.
Step 5: Wait and Finish
After the process completes, you’ll have a brand-new drive ready for use. You can now store files such as photos, videos, documents, and more.
Increase the Size of a Partition
Sometimes you may want to increase the size of a partition instead of creating a new one. This is possible if there is unallocated space available next to the partition.
Here’s how to do it:
- Locate unallocated space: Make sure the unallocated space is directly next to the partition you want to extend.
- Right-click on the target partition → Select Move/Resize.
- Drag the slider to merge the unallocated space into your partition.
- Click OK, then Apply to confirm the changes.
- Wait for the process to complete. Your partition will now have increased space.
⚠️ Note: If the unallocated space is not adjacent to your partition, you may need to move/resize other partitions to make it contiguous.
💡 That’s it! You’ve now learned how to create a new partition and also increase the size of an existing partition in Windows using MiniTool Partition Wizard.
For any suggestions or questions, feel free to drop them in the comment section below.
Leave a Reply